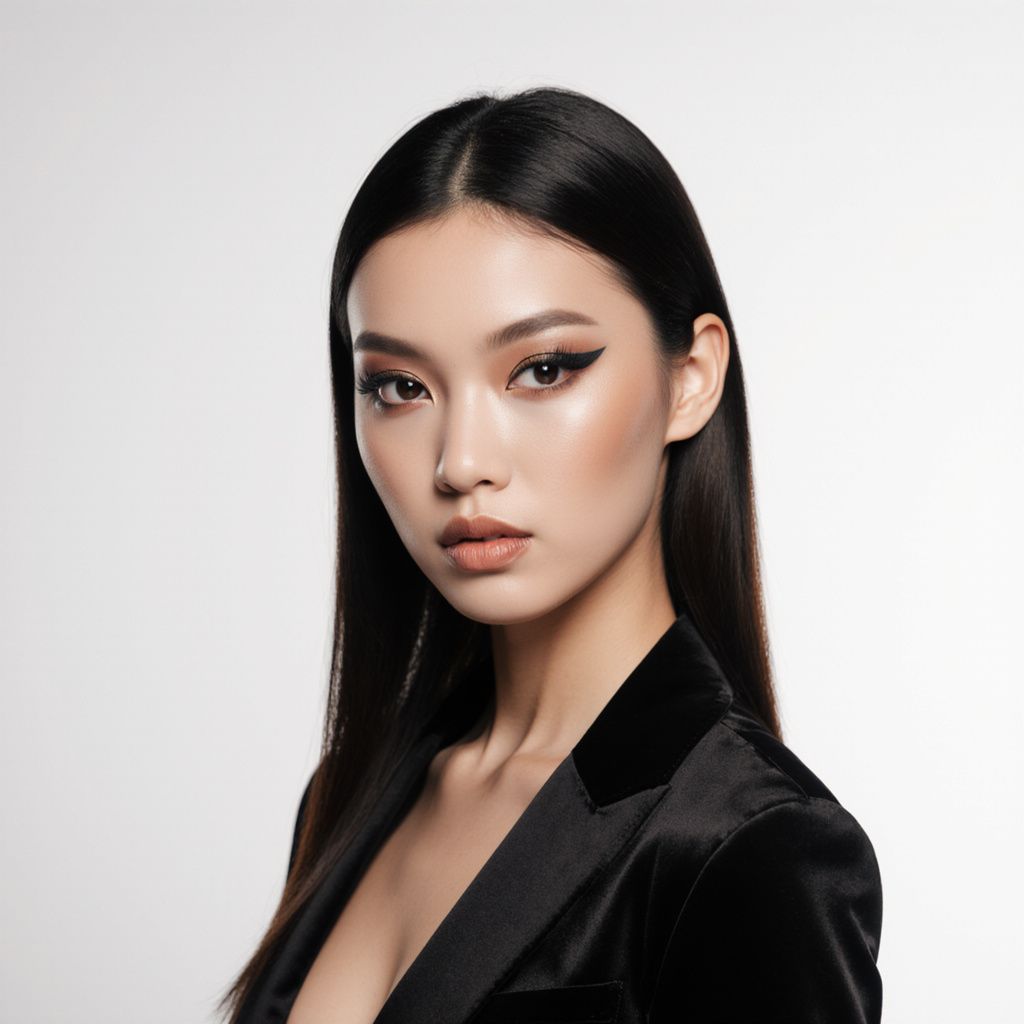
Introduction to Cam-Friendly Makeup
Hey there, fabulous cam model! Your makeup is one of your most powerful tools on camera—it can make you pop under those lights, hide imperfections, and create that irresistible, larger-than-life look that keeps viewers hooked. But cam lighting is unforgiving: harsh LEDs wash out colors, highlight textures, and amplify shine. This guide is your go-to for cam-friendly makeup techniques that look flawless on stream, stay put for hours, and are easy to apply even during long sessions.
We'll cover everything from skin prep to finishing touches, with practical tips tailored for the cam world. Whether you're a newbie or a pro, these strategies will elevate your appearance, boost confidence, and help you shine brighter than ever. Aim for a "camera-ready" vibe: amplified but natural, matte where it counts, and built to last through tips, teases, and tech glitches.
Understanding Cam Lighting and Its Impact on Makeup
Cam setups often use ring lights, softboxes, or LED panels, which emphasize clarity over warmth. Cool-toned lights can make you look pale, while hot spots create unwanted shine. The key? Test your look on camera before going live.
Key Lighting Challenges and Solutions
- HD Scrutiny: High-definition cams show every pore—opt for high-coverage, blurring formulas.
- Color Distortion: Blues and purples wash out; counter with warm undertones and bold contrasts.
- Shine vs. Glow: Sweat or oil turns "dewy" into greasy—prioritize matte bases.
Do: Set up a dedicated "cam mirror" with your actual lighting to preview looks.
Don't: Rely on bathroom lighting—it'll betray you on stream.
Step 1: Skincare and Primer Prep
Great makeup starts with great skin. Cam shifts can last hours, so prep for longevity and comfort. Cleanse, tone, and moisturize 20-30 minutes before applying makeup to let products absorb.
Essential Prep Routine
- Exfoliate Gently: 2-3 times weekly with a chemical exfoliant (like glycolic acid) to smooth texture without redness.
- Hydrate Smartly: Use a lightweight, mattifying moisturizer like The Ordinary Natural Moisturizing Factors + HA.
- Prime Like a Pro: Apply a silicone-based primer (e.g., Smashbox Photo Finish) to fill pores and create a smooth canvas. For oily skin, try Benefit POREfessional Matte Rescue.
Cam Tip: Dust translucent setting powder on your T-zone pre-primer to prevent flashback from flash or bright lights.
Do: Use a hydrating mist like Urban Decay All Nighter Setting Spray between layers.
Don't: Skip primer—it's your shield against melting under heat.
Step 2: Foundation and Concealer for Flawless Coverage
Choose full-coverage, matte foundations that photograph well in HD. Liquid formulas blend seamlessly; avoid heavy creams that cake up.
Product Picks and Application
- Best Foundations: Estée Lauder Double Wear Stay-in-Place (matte, 24-hour wear), Fenty Beauty Pro Filt'r Soft Matte (inclusive shades, blur-proof).
- Concealer Must-Haves: Tarte Shape Tape (creamy, full coverage) for under-eyes and blemishes.
Apply with a damp beauty sponge for airbrushed results: stipple foundation from the center outward, building in thin layers. Contour lightly with a shade 1-2 tones darker (e.g., Anastasia Beverly Hills Stick Contour) to define cheeks and jawline—cams love dimension!
Do: Match foundation to your jawline, not wrist, and test on camera.
Don't: Overdo contour; it can look muddy under ring lights.
Step 3: Powder, Brows, and Eyes That Pop
Powder is your longevity hero—set everything to combat shine. Brows frame your face, so fill them boldly for expressiveness on cam.
Powder and Brows
- Bake Your Base: Use Laura Mercier Translucent Loose Powder under eyes (triangle shape) and on oily zones. Let it "cook" for 5 minutes, then dust off excess.
- Brow Power: Pencil first (Anastasia Brow Wiz), then set with clear gel. Go slightly darker than your hair for definition.
Eyes for Impact
Go bold: Smoky eyes or graphic liners draw eyes to yours. Use primer (Urban Decay Primer Potion) to prevent creasing.
- Everyday Cam Eye: Neutral taupe shadows, winged liner with Kat Von D Tattoo Liner, and 2-3 coasted mascara layers (Lancôme Monsieur Big for clump-free volume).
- Pro Strategy: False lashes (Ardell Demi Wispies) add flutter without weight—trim to fit your eye.
Do: Tightline upper waterline for instant intensity.
Don't: Skip mascara on lower lashes; it balances the look.
Step 4: Blush, Highlight, and Lips That Last
Blush warms your face under cool lights; highlight adds virtual glow. Lips should be defined and kiss-proof.
Cheeks and Glow
- Blush: Cream formulas like Rare Beauty Soft Pinch (matte for longevity) applied high on apples, blended up.
- Highlight: Powder (Becca Champagne Pop) on high points—avoid liquid if prone to oiliness.
Lip Perfection
- Line with lipliner matching your tube (MAC Lip Pencil in Spice).
- Fill with liquid lipstick (Huda Beauty Liquid Matte) for 12+ hour wear.
- Top with clear gloss for shine, but blot if kissing toys or viewers.
Cam Example: For a "glam girl-next-door" look, pair rosy blush with nude lips; for seductress, vampy red with sculpted cheeks.
Do: Overline lips slightly for plumpness.
Don't: Use shimmery blush—it amplifies shine unflatteringly.
Do's and Don'ts for Cam Makeup Success
Quick Reference List
- Do: Set with spray every 2 hours; touch up powder mid-show.
- Do: Use color-correcting primers (peach for dark circles, green for redness).
- Don't: Wear glitter shadows—they reflect light weirdly.
- Don't: Forget neck/chest matching; blend foundation down.
- Do: Invest in a makeup mirror with lights mimicking your cam setup.
- Don't: Go too dewy—matte-ify with blotting papers (Tatcha Aburatorigami).
Common Mistakes and Troubleshooting
Issue: Cakey Foundation – Solution: Less product, more blending; hydrate skin first.
Issue: Panda Eyes – Solution: Waterproof mascara, set concealer with powder.
Issue: Fading Lips – Solution: Lipliner base + matte liquid; avoid oily foods.
Pro Tip: Keep a "touch-up kit" streamside: blotting sheets, powder puff, lip reapplier, and makeup remover wipes for quick fixes.
Customization for Your Cam Persona
Tailor to your brand: Soft glam for girlfriend experience (pastels, glowy skin); fierce vixen (smoky eyes, bold lips). Experiment weekly—record test streams to analyze what converts tips best. Budget-friendly dupes? e.l.f. Poreless Putty Primer or NYX Can't Stop Won't Stop foundation rival high-end.
Master these techniques, and your cam glow-up will be undeniable. You've got this—now go slay that show!